Sunday, January 27, 2013

CR125 Seat Refinished


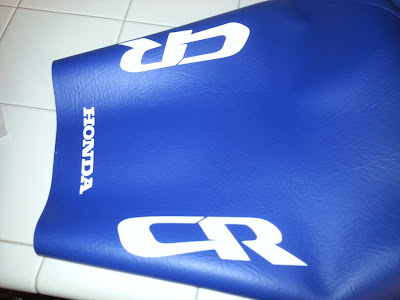
I had posted a photo of the new seat cover I ordered a week ago or so and finally got to put it on this weekend.  The cover fit great but I struggled with getting the staples to go into the seat pan.  When I did the seat on the KX I didn't run into this problem, the staples went right into the pan no problem.  I think the plastic on the CR pan is much harder than the KX.  I got it to work but it is not as clean on the bottom as the first one that I did.  If anyone knows of a heavy duty stapler that can set a staple into hard surfaces maybe you could shoot me a message and let me know.  Right now I am just using a ET50 Stanley electric stapler.

This photo really shows the only reason for replacing the seat cover, its a pretty bad rip. There is one other very small hole as well but it would have been cool to be able to use the original cover.


The cover came off clean except where the PO super glued the rip to the foam.  Its not bad tho only took a small layer off the top of the foam.

Even the bottom of the cover where it wraps under the pan was in great shape, no tears under the edges.


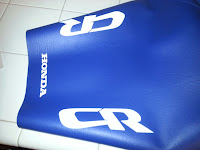


The New cover.  It looks nice!


CR125 Pipe Dents


The Pipe Off this 87 CR125 Is really in pretty good shape given that it is 26 years old.  Not too many bikes make it that long let alone most of the parts like a pipe that often would get smashed in a tip over crash.  I actually want to put an aftermarket unit on it. Back in 87 I had Pro Circuit pipes on my Hondas and would like to go that route.  Until I can find a suitable unit I will be using the stock one but needed to take this dent out best I could. 

The Dents came out very nicely. You can still see some wrinkle in the pipe up close but once I get a new coat of Satin Black on there it will look pretty darn nice.

I used the Pressurization technique, had to build some plugs of different sizes with schrader valves in them to ad air,  then used my torch to heat the areas I wanted to bring dents out of and it worked great. 


Saturday, January 12, 2013

Progress Resumes

Finally I have gotten back to working on this project.  It has taken some time to complete the KX125 Project (still waiting on finish decals) but it is time to get this thing done.  I sent the cylinder out to be bored and a new +.5mm piston fit to it.  Ill have photo report on that when it comes back in a week or so.  Here I have a photo of the new seat cover that I ordered almost a month back. It is custom made so it takes a little while to get it once ordered but I did the same for the KX and it turned out great.

The cover came from an ebay seller in Gresham, Or. jrocksqueen2006/ebay.com on ebay if you need a cover look it up.

I hope to have time to put this on in the next couple days and I will post up those photos as well.
I have ordered a couple other smaller parts to get things moving along, air filter cage and a filter, no need for photos there though.

Sunday, October 7, 2012

Fuel Tank Refinishing.


It is time to start working on the CR again, I started today with the fuel tank refinishing. I had done the fenders last winter and a few weeks ago I did the shrouds and side panels.  Today I ordered the new piston kit and a new bearing for the top end, I have to save up a bit of cash to get the cylinder work done.  With any luck and some good ebay sales it wont take too long. 

The first photo is the untouched tank, you can see some of the scratches, they give off a glare in the photo.


In the second photo you can just make out the start of the finish process.
 I started with a 320 paper on this tank because the scratches were not very deep. 
Then used 400 and 600 if you decide to do this, don't make circles with the sand paper, they are harder to get out and show up easier.  Use long motions in straight lines, cross your patterns every once in a while with each grit of paper.

The third photo is also before starting at another angle to see the scratches.
This is after the 600 grit followed by two coats of clear,


Same in this photo, after a good long cure (at least 24hrs) I will go back over the tank with 2000 grit (all sanding is done wet) then a final coat of clear.

Below are the shrouds that I refinished last week. Today I put the graphics on. Really happy with how they turned out.


Monday, March 19, 2012

Re-Assembly mock up

I did some clean up on the radiators, they didn't need that much so it was quick. Then I started putting some parts back on the bike.  I put the airbox, radaitors, fenders and some smaller mounting parts as well as the exhaust mounts and pipe just to take a look at how it is coming along.